

Hiking the Larapinta Trail
Blog written by The Matt & Grace Space
@themattandgracespace
www.themattandgrace.space
Our Complete Guide to Hiking the Larapinta Trail
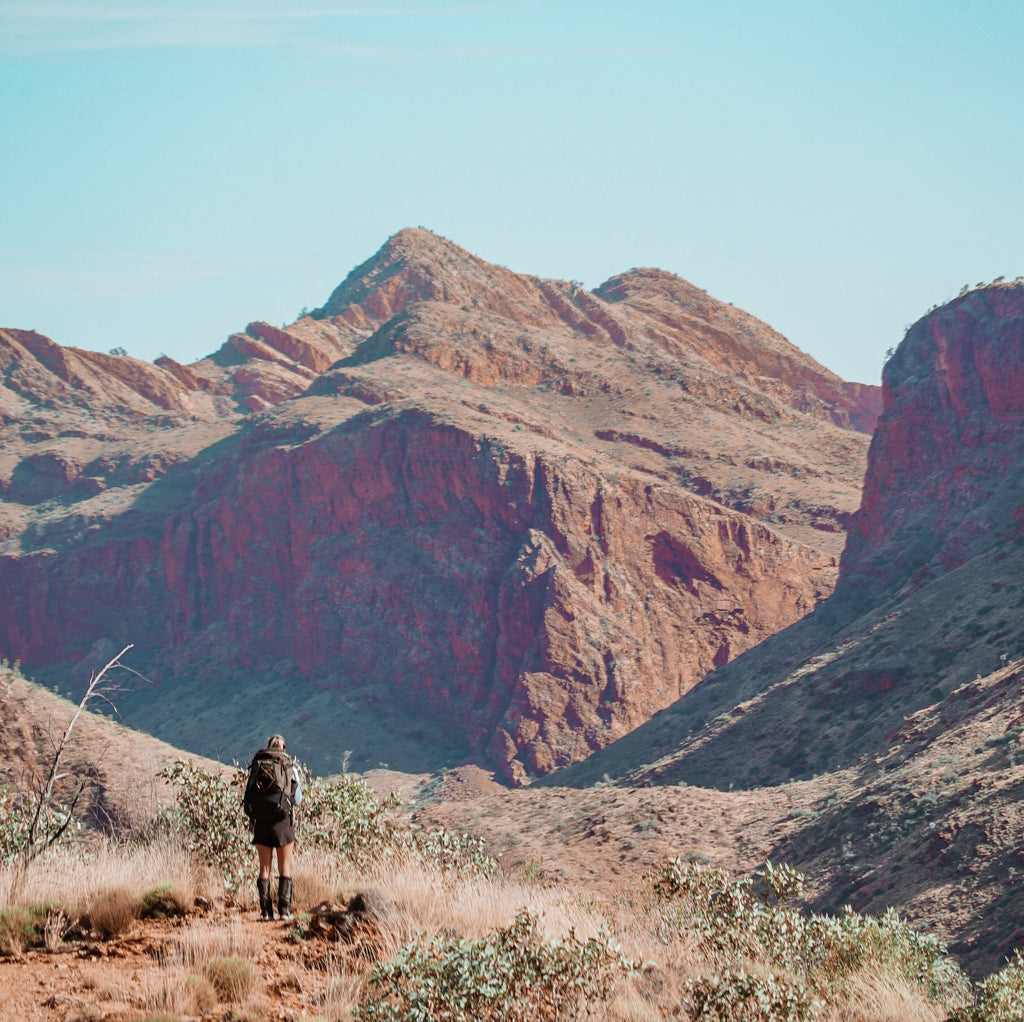
Breath-taking vistas of ancient lands, mountains that glow red when the sun sets. Swimming holes and gorges, riverbeds and ridges – the Larapinta Trail has it all! If you asked me to find a more quintessentially Australian hike, I couldn’t do it.
The Larapinta Trail begins in Alice Springs and travels 230km along the West Macdonnell Ranges towards Redbank Gorge, culminating at Mount Sonder which is the highest point of the trail. The route crosses over some rough terrain with most people completing it between 12-18 days. The trail is broken up into 12 sections and you can use these as a guide to create your itinerary as some sections are longer than others.
Planning your hike can seem like an overwhelming task but we only decided to go to Central Australia three days before we started hiking and we felt like we had plenty of time to get our stuff organised. Check out our Larapinta Trail Gear List if you’d like to have a squiz at what we took.
Quick Notes
Distance: 230km
Time Needed: 12-18 Days (If you’re seriously fit and experienced you could do 10)
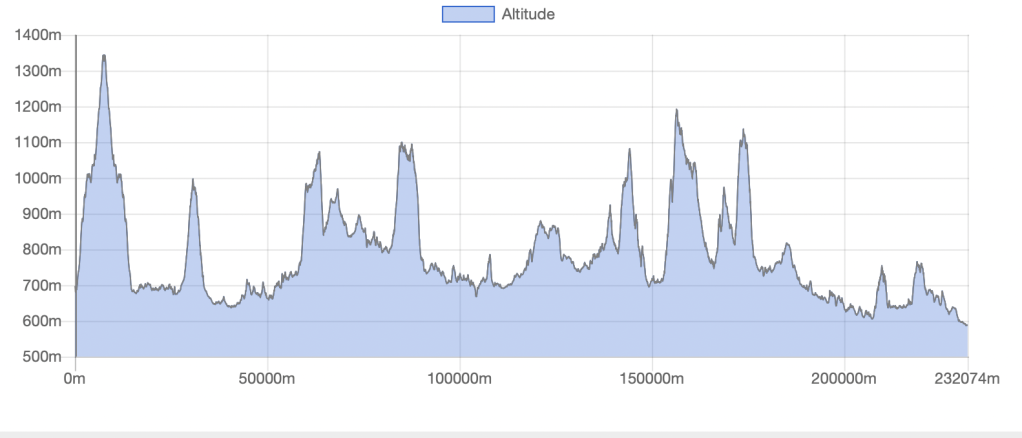
Elevation: You’ll gain 6830m of elevation throughout the hike
Best Time: May – September (it can be bloody hot otherwise and sadly some people haven’t made it home)
Permits: Book the trail & Book Campites here. Rangers can come along to any campsite and check your permits.
Difficulty: Not extreme, but you want a good base level fitness.
Highlights
- This whole area has a crazy deep history with the Arrernte people inhabiting the area for the last 40,000 years or so and the land itself just feels so ancient. There’s definitely something very special about this place.
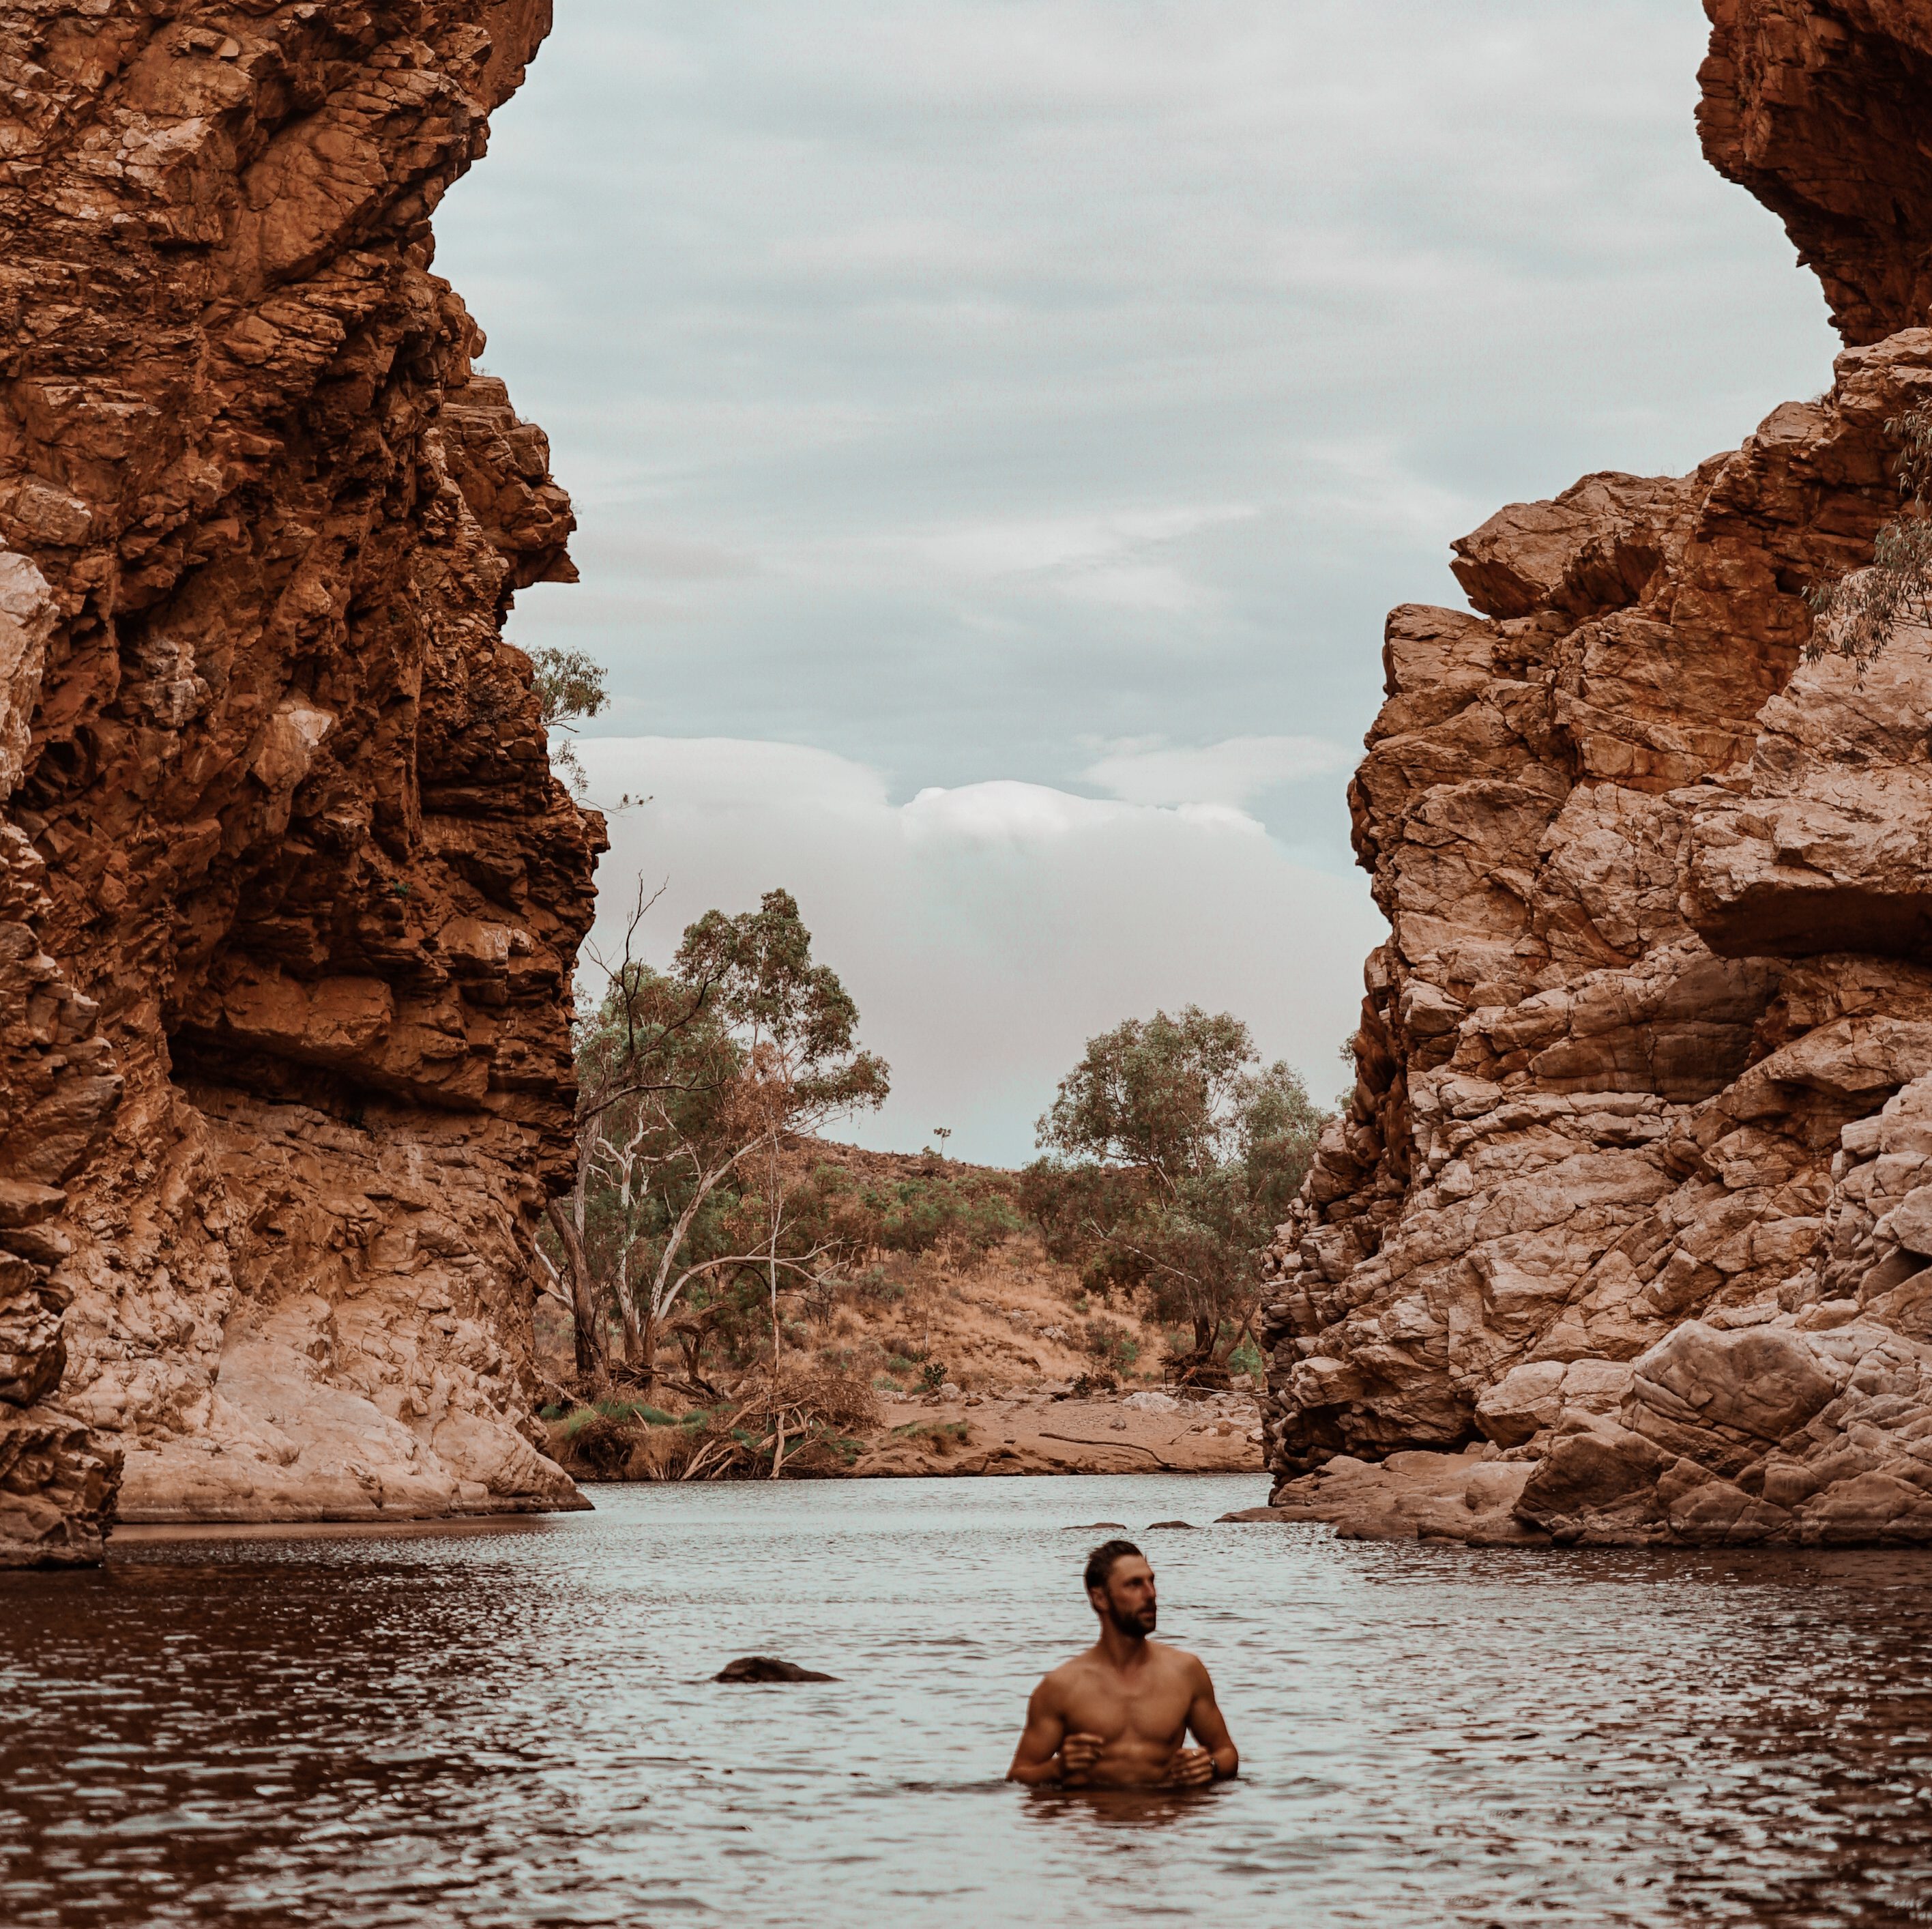
- All of the ‘gaps’, gorges and chasms. Go and explore them all! Ormiston gorge was exceptionally speccy.
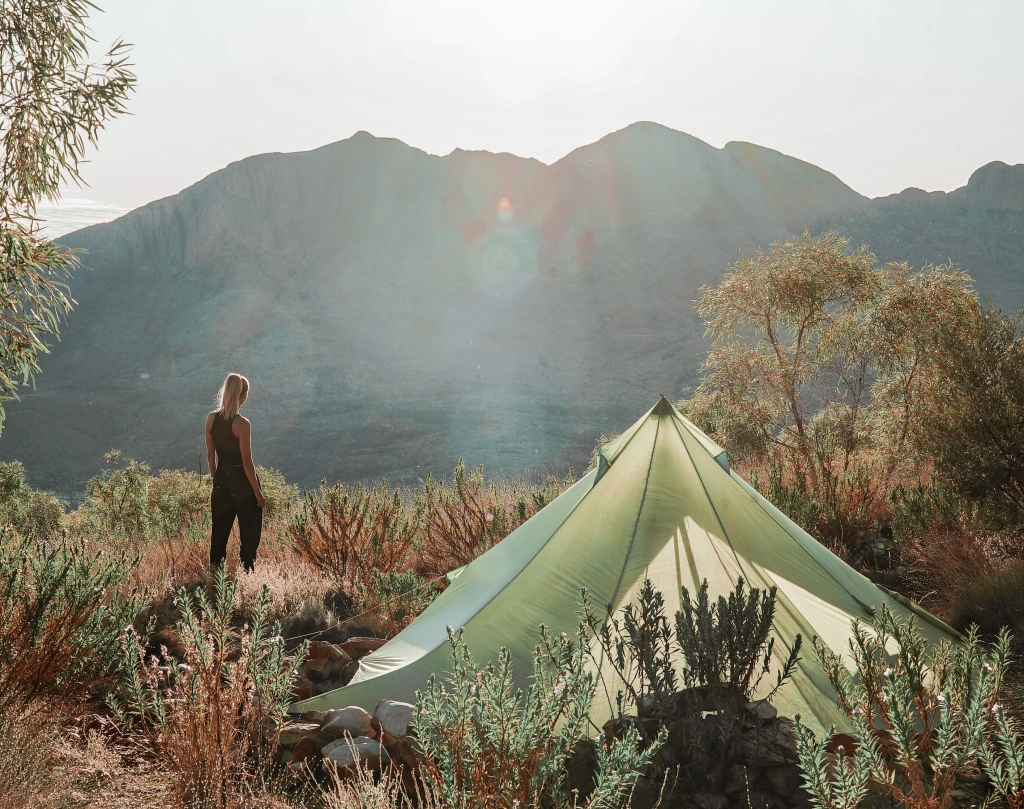
- Brinkley Bluff, Counts Point and Hilltop Lookout offered some epic views and camping options
- Swimming! Swim whenever you can. A good friend of ours always says “you never regret a swim”.
- Razorback Ridge was stunning
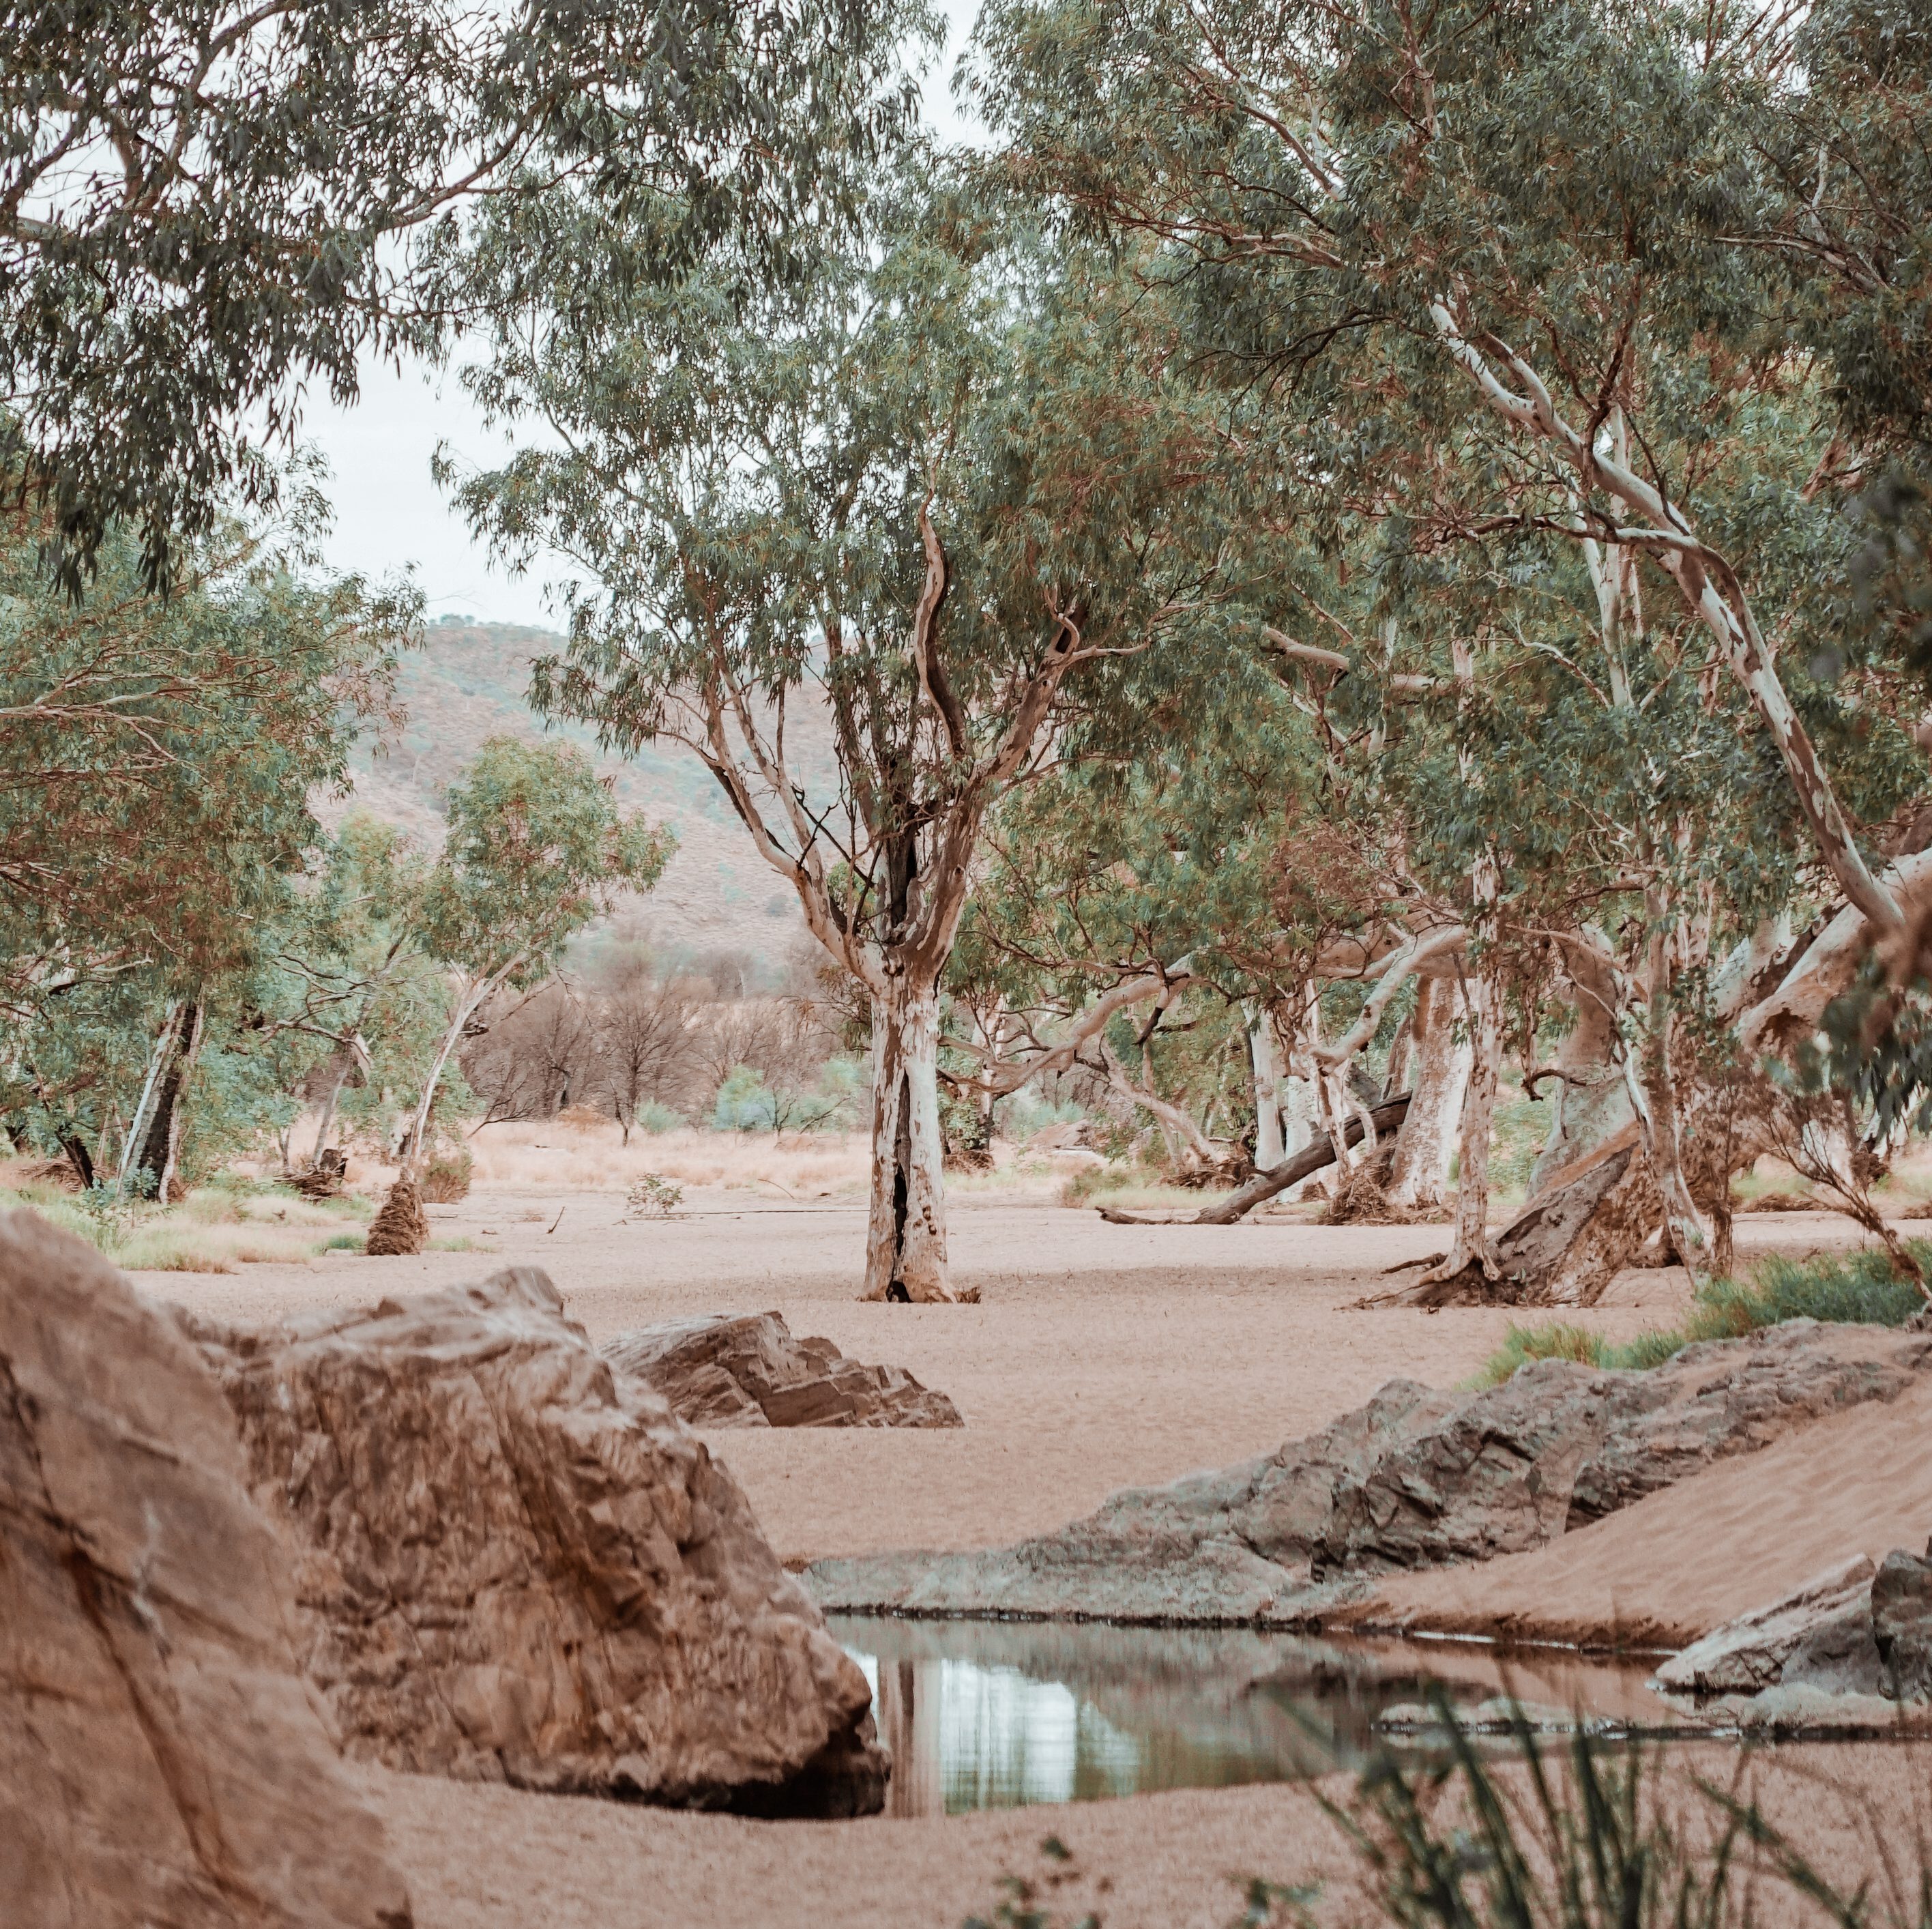
- Camping in riverbeds
- Ormiston Pound walk (or run if you’re feeling energetic)
- Camping at Hilltop Lookout with an insane view of Mount Sonder
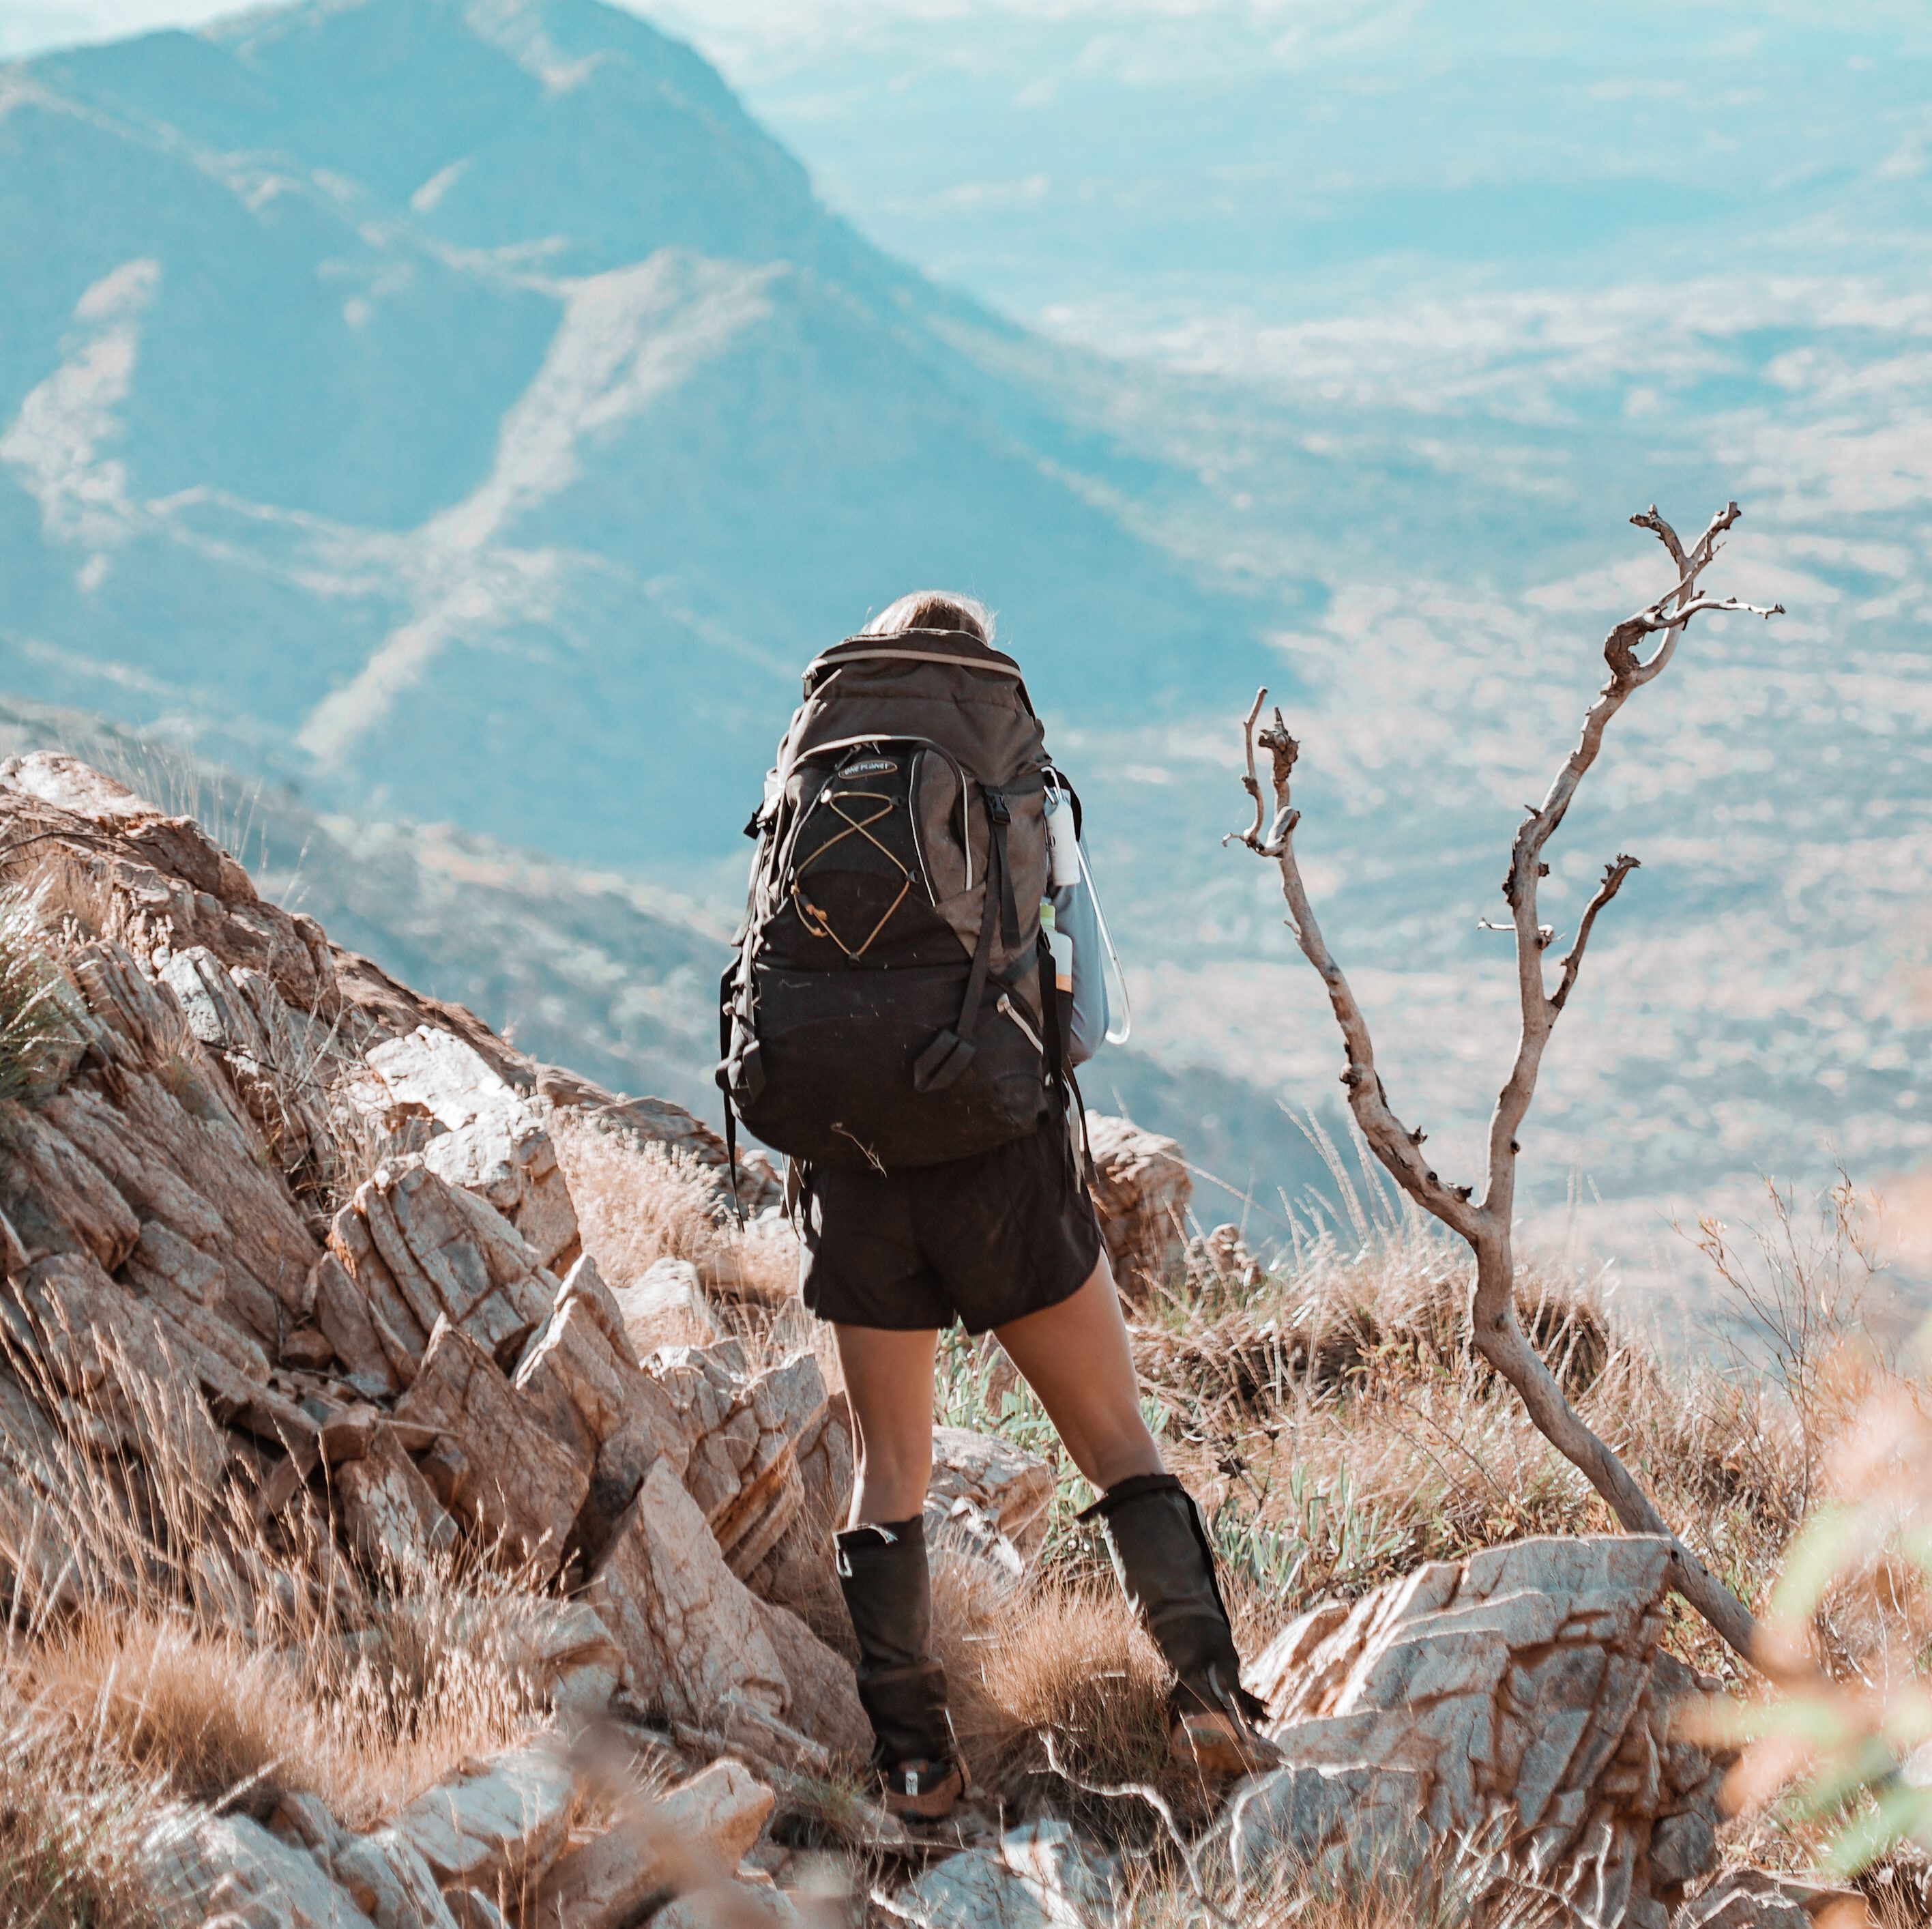
- The final climb up Mount Sonder is a rewarding end to the trip
Lowlights
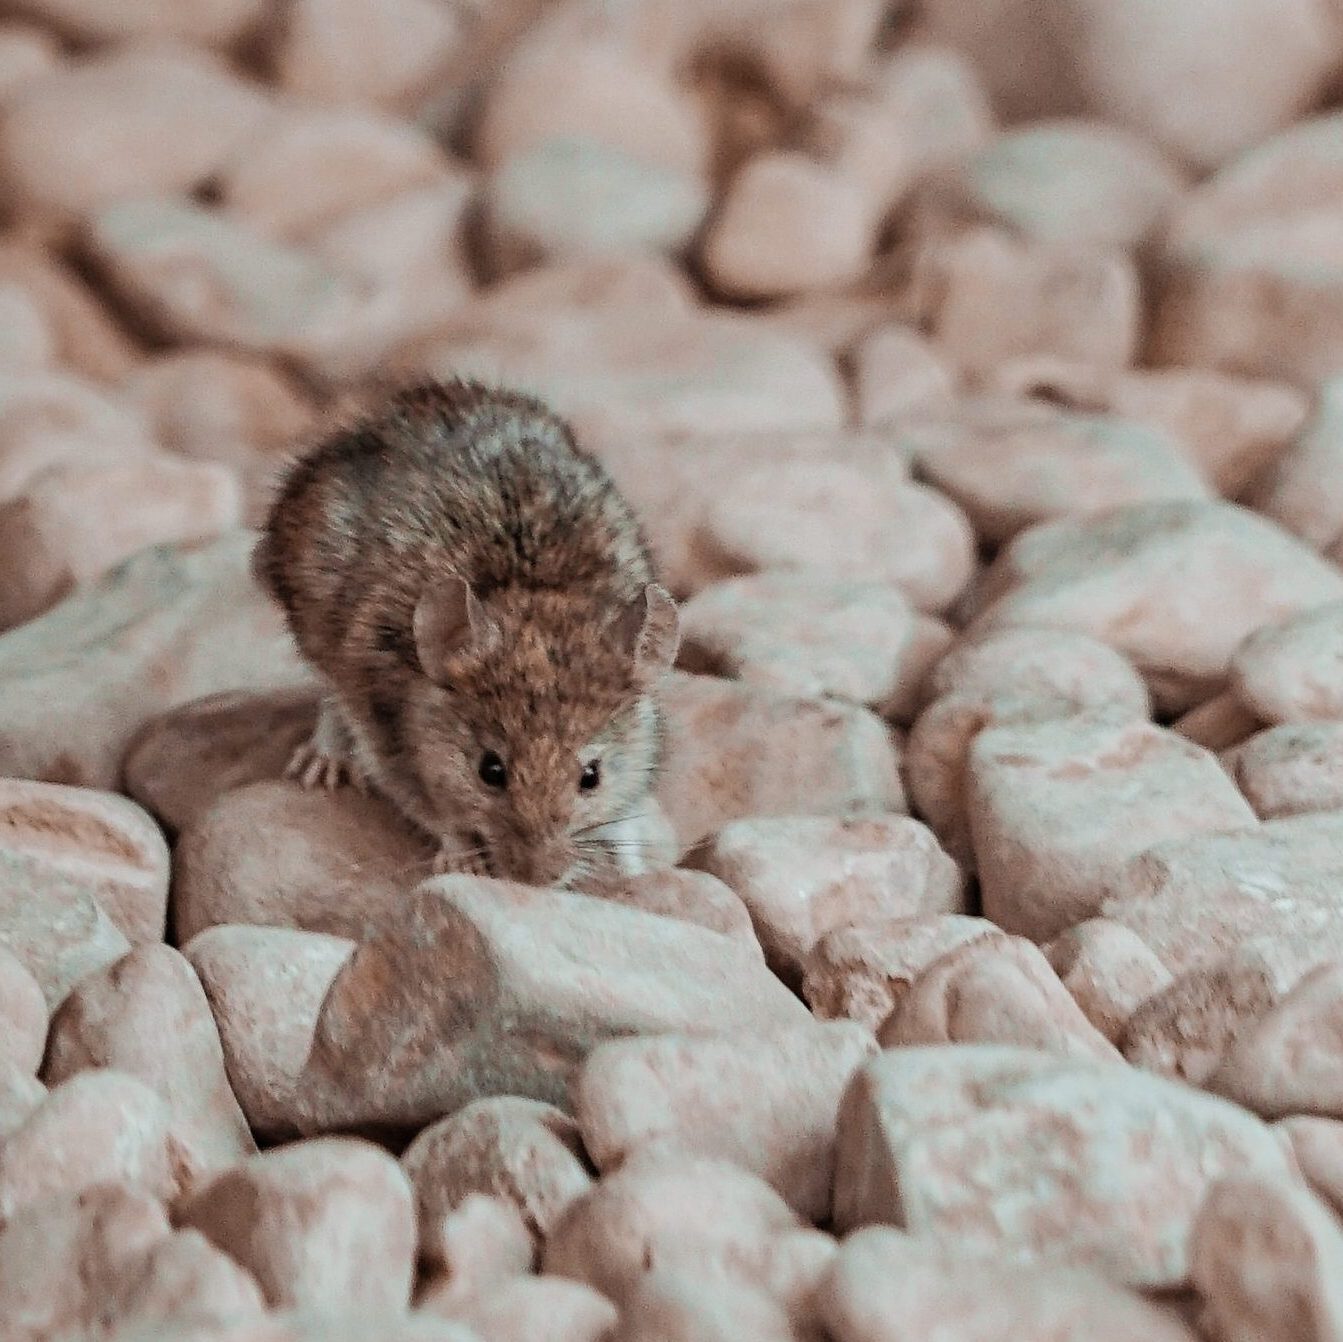
- The mice at night time! We saw the most at Hugh Gorge, Serpentine Gorge – and all reports on the track was that Serpentine Chalet Dam is the worst for it.
Difficulty
The Larapinta Trail is well-maintained, extremely well signposted and is generally very easy to follow. The only exception is at creek beds when floods can wash away the signs. I found that if you stop and look around for long enough, you’d usually stumble across the track or a sign. It’s definitely worth taking the hard copy maps (buy at Alice Springs Information Centre) and downloading the free maps on the Avenza app as a backup. Here’s a look at the elevation profile:
Where to start the hike
You can walk the hike in either direction, although we recommend hiking from East to West (Alice Springs to Redbank Gorge) because it was so epic being able to finish the hike by climbing up Mount Sonder.
- The Old Telegraph Station: This is the official start point of the hike. There’s no real grand start off point – just a shelter and a small sign and off you go!
- Alice Springs Central: If you don’t want to organise a ride to the Old Telegraph Station, it’s only a 4.3km walk from the centre of Alice Springs to the trailhead.
- Redbank Gorge: If you’re walking from West to East you’ll be wanting to start here. Some very nice camping in the river bed before you set off.
- Any other road access points: There are quite a few points where you can drive in to meet the Larapinta trail along the way so if you only want to walk a part of it, this is pretty easy too.

Transportation from the end of the hike
There are so many companies running shuttle services to and from Redbank Gorge daily. They’re fairly expensive (we paid $390 for two of us from Redbank to Alice!). You’re probably going to meet somebody who could give you a lift back to Alice, but it’s a bit of a gamble and it’s nice to finish the trip knowing you’ve got a ride home. Note: the transit companies won’t let you on if you haven’t pre booked).
Planning your itinerary
Now it’s time to determine your itinerary. Most people will take 2 weeks or longer to complete. When planning our itinerary, we built it around the food drop locations we wanted to use. We had 14 days on the trail but could have done it in 12. Others we spoke to had 18 days and could have done it in 16 so it’s completely up to how much chill time you’d like.
Having a rest day at Ormiston Gorge gave us the opportunity to reset and do a couple of the day hikes there which were beautiful. Also, the scones there are heaps yum!
Our Larapinta Itinerary:
o Day 1: Alice Springs Telegraph Station to Simpsons Gap (23km)
o Day 2: Simpsons Gap to Jay Creek (24km)
o Day 3: Jay Creek to Standley Chasm (via high route) *Food Drop* (13km)
o Day 4: Standley Chasm to Section 4/5 Junction (16km)
o Day 5: Section 4/5 Junction to Hugh Gorge (17km)
o Day 6: Hugh Gorge to Ellery Creek North (28.9km)
o Day 7: Ellery Creek North to Serpentine Gorge *Food Drop* (12.8km)
o Day 8: Serpentine Gorge to Waterfall Gorge (27km)
o Day 9: Waterfall Gorge to Ormiston Gorge *Food Drop* (15.7km)
o Day 10: Ormiston Gorge ‘Rest’ Day (Pound Walk 9km)
o Day 11: Ormiston Gorge to Finke River Camp (9.1km)
o Day 12: Finke River Camp to Hilltop Lookout (10km)
o Day 13: Hilltop Lookout to Redbank Gorge (via Mount Sonder 31.6km)
o Day 14: Swim in Redbank Gorge and lift back to Alice

Food Drops
Although the food drop locations aren’t spaced out perfectly, it’s so amazing to be able to replenish your stocks every few days. We had three food drops:
1. Stanley Chasm (Privately Owned)
2. Serpentine Gorge (Key from info centre in Alice)
3. Ormiston Gorge (Key from info centre in Alice)
So… how do you organise this?
Drop them out yourself:
We went for this option because we had our own car. The day before we started hiking, we grabbed a key from the Information Centre in Alice Springs ($60 with $50 refunded upon key return) which opens the Serpentine Gorge and Ormiston Gorge food drop locations. Then we drove to Stanley Chasm, paid a small fee ($5) to drop a box there (because it’s privately owned), then drove to Serpentine Gorge and Ormiston Gorge to drop the others off.
Organise a company to do it:
Similar to the transfers, there are heaps of companies offering to drop out your food drops for you. If you’re flying in and don’t have a car, this is a great option. They’ll bring empty boxes to your hotel/caravan park, you fill them up, then they’ll come and collect them from you. It’s an extra cost but makes it pretty easy for you.
Note: Fresh food in your first drop should be OK but will go nasty any longer than that.

Maps & Navigation
The Larapinta Trail information pack is awesome. This can be either ordered online or bought from the Alice Springs Information Centre. It’s $42 which might seem like a sting but we loved having these maps. There’s a large poster-sized map where you can plan your itinerary, mark food drops etc. There’s also 12 section maps with some good detail. These all come in a plastic pocket and we found it to be very handy.

Avenza Maps is a handy app that places your location on the map. You can download all 12 section maps to your phone prior to the hike and this works as a pretty good backup if you’re worried about being geographically challenged!

Water
Water can be found in tanks throughout the hike. These tanks are filled regularly by the rangers and are at each of the 12 section shelters plus some of the campsites on the longer sections.
If you’re planning on camping away from a water source, you’ll want to have a fairly good water capacity. We carried 7 litres each when we were camping up high (a 1L water bottle and a 6L bladder).
Keeping your food safe
Someone told us to bring some fishing line on our trip so that we could hang food bags from trees. Why? MICE! Some campsites have plague proportions of mice and the local antechinus. Some hikers had food bags in their packs and the mice ate through. Food bags in their tent and the mice ate through. Do yourself a favour and hang your food in a tree or a shelter away from your tent.

Tips and Tricks
- Extra water capacity for high camps (we had about 7L each)
- Fishing line to hang your food bags from to stop the mice
- Extra blister kit (we never get blisters and we both got some on this hike)
- Most high points on the hike have phone reception. There’s Optus reception at Ormiston Gorge
- Power charging stations at shelters are great but will only work when the sun is shining
- Some sort of emergency device (EPIRB, SPOT etc) is recommended. We didn’t have one and felt a little vulnerable in some of the more remote sections.
- We took our Helinox chairs with us and can’t imagine the trip without them!
- Have a look at the Larapinta Trail facebook page – it’s a great community to ask questions and get some extra tips
That’s about it! If you have any questions, comments or suggestions, send them through to themattandgracespace@gmail.com or pop in to see our instagram for some more photos. Happy hiking!!